Saturday, January 18, 2020

Parisian Blossoms Suite

The beauty and regality of this suite will have you falling for both of these bundles. I apologize if you do not yet own a die cutting machine but this Eiffel tower die is 'to die for'.

 For this card I used Petal Pink Cardstock cut at 8.5X11", then I cut the beautiful Parisian Blossoms Specialty Designer Paper at 4X5.25". 
You can see the shimmer of the background wording on the paper. Then I cut a smaller piece of Petal Pink at 3X4.25".  
I then sponged some Whisper White Craft Ink on the Parisian Flourish Embossing Folder, applied the piece of cardstock to the uninked side, closed and ran thru Die Cutting and Embossing Machine!  
In the image below you can probably see the definition that just that little bit of inking the emboss folder makes.
I just realized that I used every item in the Suite Bundle except for the Forever Blossoms Bundle. I used the incredibly gorgeous Petal Pink Metal Edge Ribbon and the Champagne Rhinestone Basic Jewels.  I think I should have done the cut-out die of the tower now that I look at this longer.
The next card I wanted to highlight is the white card with the black tower outside the window
I'm disappointed that you cannot see the blue shaded sponging outside the window.
I saw a similar idea using these Stained Glass Dies (found in Annual Catalog)
It's a stunning design, don't you think? 
So, I combined the 2 sets in the Suite for this card.
This time I did do the cut out of the tower....in Champagne Foil.
And the 'Amour' cutout is done with a die from the set!

 And this double fold Z card, I learned from one of my team, Sondra Jumper.
We just did a double z fold in January, but I love the 'largeness' of this one!
Base card: 8.5X5.5 Score: 2.125, 4 25
Zfold:7.5X4  Score: 2.5, 5
This style card will be made in my February Class
Inside view:

So, Here's one with just the Forever Blossoms Bundle

Forever Blossoms Bundle #153781 $53
Parisian Beauty Bundle #153778 $43
Parisian Blossoms Suite Complete Bundle:#153934 $133.50
(includes both of the above bundles, champagne rhinstones, Parisian Flourish EF, Petal Pink metal-edge ribbon)
If you are in love with this style, you are welcome to place your order on my site. 
Don't forget, it's Sale a Bration and with every $50 purchase you get to choose a free SAB item!
Wednesday, January 8, 2020

Painted Poppies and Stampin' Blends

Painted poppies is today's new stamp set. It's actually available as a bundle and such a pretty one! 
There are a variety of images and types almost like a 2-step. 

  I used the masking technique to make this card!

Tip: I stamped the flower on a post it note then cut it out very close...almost cutting off the edge.  After stamping my Full flower, I put the post it over it, lining up the petals.  Then I stamped the other 2 images overlapping the stamp onto the post it note just a bit.  When you pull off the post it note, you feel like you've really accomplished something. The coloring was done with Stampin' Blends.  I didn't something different.  In painting, if you want a true red, you actually put a layer of yellow down first.  I thought I'd try that here.  I then added some Pumpkin Pie and finally Cherry Cobbler.  I did use the Lifter to lighten some areas then. I used the lt. Smoky Slate to go around the edges of the flowers and leaves to give the idea of depth...I did take the lifter to that so it's now very faint.  You can see the shadow in person much better.


This card was quick and easy and I just love the colors: Mango Melody and Pumpkin Pie


I saw a card like this done by one of our German demonstrators and I thought it was very cute...I love the mauve (rococco rose stamped off) and gray tones with a touch of Blackberry Bliss.

I used a Waterercolor Wash Technique for this card: Be sure Aquapainter has plenty of water and the tip is very wet.  Squeeze the back of your ink pad to place ink on the inside of the lid, work the bristles of the brush into the color creating a puddle, then go to your paper and do a quick and light brushing, moving down the paper as you go.  You may have to repeat several times for each color til you get the look you want.  Please note…it will look different every time!  It’s watercolor

Also, the layered stamping technique: I cut the white center to 3"X4" and laid it onto my folded white card.  I stamped all the images, then after coloring, added a layer of basic black 31/4" X 4 1/4". The ink colors I washed on with the Aquapainter are: Old Olive, Flirty Flamingo and Mango Melody

   
 If you love this set as much as I do, you'll want to add it to your wish list!  

Click Hereto view and download a printable and to get a list of the items I used on 2 of the cards to add to your cart if you like.


Tuesday, January 7, 2020

Under My Umbrella Stamp and Punch Bundle

From the new mini catalog..... So excited to have more fabulous punches. Love that Stampin Up! listens when we ask. Ok, I need your help..which one do you like best? It helps me to know what my audience likes. Thanks in advance!
This little meerkat is from our Sale a Bration Stamp set, The Gangs All Meer.  I'll show some more fun ideas with that set later.


 I was having fun coloring with our Blend markers (alcohol markers). I used it to shade the umbrella in the first card and it turned into coloring on this card. But I love how the light smoky slate one gives great depth to things...I used it right under the umbrella and below the little sprig of flowers in the corner.  Added some crystal effects to the rain drops and the yellow flowers.  I used just a regular black marker to do the doodling and to add extra circles where I wanted them on the flowers

One this card, I stamped and punched designer paper from the assorted stack that you get when you sign up as a new demonstrator this month.  I couldn't find enough designes that coordinated so the umbrella on the bottom right is stamped and then I just drew curved lines in with a black marker to create the stripes.  I added some sequins from the Peaceful Poppies...there were black and calypso ones that coordinated with my colors.  The saying and layered piece are from So Sentimental Bundle
 #153786

Monday, January 6, 2020

My Meadow, Scenic Stamping

Scenic stamping has exploded at Stampin' Up! since the addition of the set, Waterfront, a set by million dollar achiever, Connie Heisey a few years ago. This set is no exception with it's scores of potential layouts.  Here are a few I came up with and many items are inspired by other creators with my added taste. Hope you enjoy.
For the orange ribbon, I created it using the new Whisper white 1/4" seam binding and the light Pumpkin Pie Blends marker.  It dries fast, creates instant color with so little work...and it's not gonna make my card messy like coloring with an ink pad or regular marker could.  Balmy Blue and Pumpkin Pie with a touch of Old Olive
 On the above card, I used our braided linen trim #147808 for the bow.  After tying, I stretched the fibers to create this look.  You can see on the spool what it looks like before it's stretched. Cherry Cobbler, Crumb Cake, Old Olive and Balmy Blue, along with Early Espresso and Mossy Meadow for darkest colors
 This daffodil ribbon was created similar to the orange one above and colored yellow using the Daffodil Dark Blends.  I tied the bow on my hand-dandy bow maker.
 For this bow, I used the same technique as above, used my bow maker but this time wrapped the ribbon around the dowels twice, before tying!  Hence, double bow!  I stamped the scence, then cut out the center of the design with our Layering Ovals, decided I wanted the remainder of the scene so I layered it back on the original!  It's strange how things come together!
I think this set is just pure fun and creativity waiting to be discovered. 
#151650

Saturday, January 4, 2020

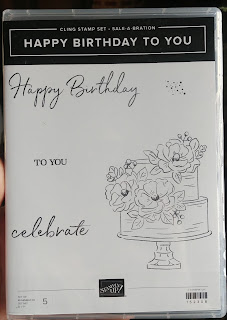
Sale-a-Bration 2020 Happy Birthday To You Stamp Set

First set Id like to celebrate is this gorgeous cake with different greetings, Happy Birthday To You. 
You can get it Free with any $50 purchase. 
Our Mini catalog went live yesterday along with Sale a Bration 
Great time to build your supplies with great free stuff!
It was very difficult to get good color on this card.  The base is Petal Pink and the cake is colored with petal pink and the flowers are stamped in Rococco Rose and the center of the flowers is some soft fuzz created by 'grating' the Rococco Rose cardstock.  Hope you can see on the zoomed in pic below.
I also added Wink of stella to the cake after coloring.  I think you can see the shimmer in the zoom as well.
Other elements: I used the embossing paste and masks to create the brick look on the background.  I did it on a piece of designer paper with silver print (not the most effective choice) then I sponged some crumb cake onto the bricks after they were dry.
Also, the cake and flowers were stamped onto Watercolor Paper and I love the fluidity of color on the cake!
 With this card I used Rich Razzleberry and BlackBerry Bliss with a touch of Copper foil. 
Hint: to save on my foil, I actually cut out the inside to save for another project since only a 'frame' will be seen!

I embossed the design in copper, then put some bleach on a piece of felt and colored with bleach using an old blender pen that's been retired because it had dried out. Once I removed the color with bleach, I could recolor as needed but chose to just leave it as it turned out.
 I loved the elegance of the card so I didn't want to add a tag for sentiment so I used a border stamp from another set to emboss an edge which I could then 'bleach'. 
Just a note, you cannot reapply ink to any area til bleach is completely dry or it will just bleach it out.
#152308  Only for FREE with a $50 purchase